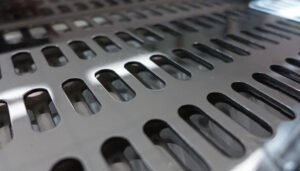
Laser Cutting Tips for Ultra-Thin Stainless Steel Sheet Without Warping

Are you struggling with ultra-thin stainless steel sheets warping during laser cutting? This frustrating issue leads to material waste, project delays, and increased costs. By mastering a few key techniques, you can eliminate warping and achieve perfectly clean, precise cuts every single time.
At its core, preventing warping when laser cutting ultra-thin stainless steel involves minimizing heat input and thermal stress. This is achieved through a combination of meticulous preparation, optimized laser settings like low power and high speed, precise focus control, and effective cooling strategies.
As the Global Business Director for MFY, I’ve spoken with countless clients who face this exact challenge. They invest in high-quality, ultra-thin stainless steel1 for its precision and lightweight properties, only to see it deform under the laser. It’s a common but solvable problem. In this guide, I’ll walk you through the practical, actionable steps our most successful partners use to conquer warping and unlock the full potential of their materials.
The incredible precision of laser cutting is a double-edged sword when working with delicate materials. On one hand, it offers unparalleled accuracy for complex geometries. On the other, the intense, localized heat it generates is the primary cause of warping in thin sheets. The material expands and contracts so rapidly that it deforms. At MFY, our integrated approach2, from producing the coils to delivering finished sheets, gives us a unique perspective. We understand that the material’s inherent properties and its journey through the supply chain directly impact its performance under the laser. This knowledge allows us to guide our clients, not just as suppliers, but as partners in achieving manufacturing excellence.
Low power reduces warpingTrue
Using lower laser power helps minimize heat input, which is crucial for preventing warping in thin stainless steel sheets.
High speed causes more warpingFalse
Actually, higher cutting speeds reduce heat accumulation in the material, helping to prevent warping in thin sheets.
What preparations are necessary before beginning the laser cutting of ultra-thin stainless steel sheets?
Rushing into a laser cutting job without proper setup is a recipe for failure. You risk misaligned cuts and, worse, immediate warping, forcing you to scrap the entire sheet. Taking a few moments to properly prepare the material and the workspace is the most effective first step toward success.
To prevent warping, essential preparations include thoroughly cleaning the stainless steel sheet to remove contaminants, ensuring it is perfectly flat, and securing it firmly with an appropriate fixture. Additionally, inspecting the material for uniform thickness and allowing it to acclimate to the workshop environment are crucial.
I recall a conversation with Ravi, an engineering manager at a medical device company in Bangalore. His team was struggling with high rejection rates for a critical component made from 0.5mm 304 stainless steel sheet. The parts were consistently warping, compromising the sterile seal they were designed for. The issue wasn't their state-of-the-art laser, but their prep process. They were overlooking the microscopic oils and dust on the sheet surface and weren't using the right support bed for such a thin gauge. Once we walked them through a rigorous preparation checklist, their rejection rate dropped by over 90%. This experience highlights that the most advanced cutting technology is only as good as the preparation that precedes it. It’s a holistic process where cleanliness, material stability, and proper machine setup work in concert to create the ideal conditions for a perfect cut. This foundational stage sets the tone for the entire operation, directly influencing the thermal dynamics and final quality of the part.
The preparation phase can be broken down into three critical areas: the material itself, the way it's held, and the environment it's in. Each plays a vital role in mitigating the thermal stresses that cause warping. Overlooking any of these steps is like building a house on an unstable foundation; eventually, cracks will appear. For manufacturers working with the tight tolerances required in industries like medical devices or electronics, this phase isn't just best practice—it's a non-negotiable part of the quality assurance process. The goal is to control every possible variable before the laser even fires, ensuring that the only factor at play is the precision of the cut itself. This proactive approach saves immense amounts of time and material down the line.
Material Inspection and Surface Cleaning
The first step in any high-precision job is to scrutinize your raw material. Even high-quality stainless steel sheets from a trusted supplier like MFY can pick up dust, grease, or other contaminants during transit and handling. These substances can have a surprisingly significant impact on the laser cutting process. A small patch of oil, for example, can absorb laser energy differently than the clean metal around it, causing a localized heat spike that initiates a warp.
Therefore, a thorough cleaning process is essential. We advise clients to use a lint-free cloth and a suitable solvent, like isopropyl alcohol, to wipe down the entire surface of the sheet. This ensures uniform energy absorption across the workpiece, leading to a more consistent and stable cut. It’s also crucial to inspect the sheet for any pre-existing imperfections, such as scratches or variations in thickness, which could also lead to unpredictable results.
At MFY, our quality control processes for products like our 304 and 316 stainless steel sheets3 are designed to ensure maximum consistency. However, we always empower our clients with the knowledge to perform their own final checks. This simple act of cleaning and inspection is the lowest-cost, highest-impact insurance policy against warping available to any fabricator.
Workpiece Fixturing and Support Systems
How you hold the ultra-thin sheet is just as important as the cut itself. An improperly supported sheet will vibrate or lift slightly during cutting due to thermal expansion, making a clean, warp-free result impossible. The goal of the fixturing system is to hold the material perfectly flat and stable without introducing new stresses. Aggressive clamping on the edges of a thin sheet can actually induce tension that is released during cutting, causing the material to buckle.
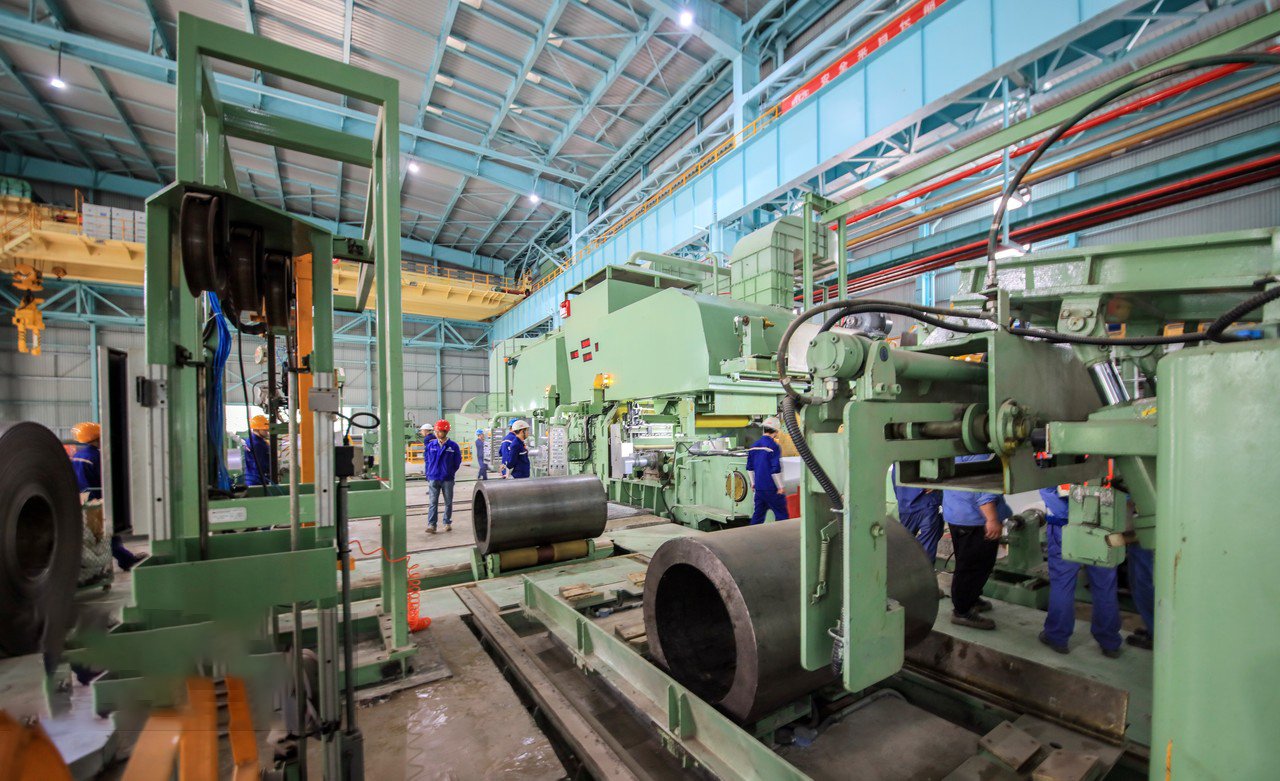
For ultra-thin materials, a specialized support bed is critical. Standard slat beds are often inadequate as the thin material can sag between the slats. The two best options are pin-style beds and honeycomb tables. A pin-style bed provides support at numerous points, minimizing sag and allowing heat and debris to fall away. A honeycomb table offers even more uniform support and is excellent for intricate work, as it prevents small, cut-out pieces from falling through and potentially disrupting the laser head.
I worked with an electronics enclosure manufacturer in Southeast Asia who switched from a standard slat bed to a honeycomb table for their 0.4mm stainless steel parts. This change alone, combined with carefully placed pneumatic clamps just outside the cutting path, eliminated the micro-vibrations that were causing slight inaccuracies and warping on their complex designs. The right support system doesn't just hold the material; it becomes an active part of the thermal management strategy.
| Support Bed Type | Primary Advantage | Best For | Potential Downside |
|---|---|---|---|
| Honeycomb Table | Excellent, uniform support for the entire sheet. | Intricate, complex parts with small cut-outs. | Can be harder to clean and may cause minor back-reflection. |
| Pin-Style (Nail) Bed | Reduces contact area, minimizing back-reflection and heat buildup. | General cutting of thin sheets, especially larger parts. | Less support than a honeycomb table, may not be ideal for tiny parts. |
| Standard Slat Bed | Common and cost-effective. | Thicker materials (>3mm). | Inadequate support for ultra-thin sheets, can lead to sagging. |
Environmental and Material Acclimatization
A factor that is often completely ignored is thermal acclimatization. A stainless steel sheet brought from a cool storage area into a warmer workshop needs time to reach thermal equilibrium with its surroundings. If you cut it immediately, the temperature differential between the material and the environment can contribute to the thermal stress problem. The sheet will be expanding to room temperature at the same time the laser is introducing intense, localized heat.
The solution is simple: allow the material to sit in the workshop for a few hours before cutting. This allows any internal stresses from temperature changes to normalize. This step is especially important in climates with significant temperature swings between storage and production areas. It’s a zero-cost preparation step that enhances stability and predictability.
Similarly, careful handling is paramount. Bending or dropping the sheet can introduce mechanical stresses into the material. These stresses remain locked in the sheet until the laser cutting process releases them, often resulting in unexpected warping. Treating the ultra-thin sheet with care from the moment it arrives until it is fixtured on the machine is a critical, though often unspoken, part of successful preparation.
Cleaning prevents warpingTrue
Contaminants like oil absorb laser energy unevenly, creating localized heat spikes that cause warping.
Slat beds work for thin sheetsFalse
Standard slat beds cause sagging in ultra-thin materials; pin-style or honeycomb beds are required.
Which laser settings are most crucial when cutting thin sheets without causing warping?
Using the wrong laser parameters is like trying to perform surgery with a sledgehammer. Standard settings designed for thicker plates will overwhelm an ultra-thin sheet with excessive heat, causing melted edges and severe warping. Fine-tuning your laser's settings is absolutely essential for a successful outcome.
The most crucial laser settings are minimizing laser power to the lowest effective level, maximizing cutting speed, and using a high-pressure inert assist gas like nitrogen. This combination drastically reduces the Heat Affected Zone (HAZ), preventing the thermal buildup that causes warping.
The relationship between laser power, speed, and assist gas is a delicate dance. Too much power melts the material; too little fails to cut through. Too slow a speed allows heat to spread; too fast results in an incomplete cut. Getting this "recipe" right is fundamental. I often share the story of an automotive client in India who needed to produce thousands of thin, precise gaskets from 0.8mm stainless steel4. They were experiencing a high failure rate due to warping. By collaborating with their technicians, we helped them systematically test and dial in their parameters. We discovered that a slight reduction in power, coupled with a 15% increase in cutting speed and a switch to high-pressure nitrogen, was the magic formula. This not only eliminated the warping but also increased their production throughput. This demonstrates that mastering these settings is not just about quality control; it's a direct driver of operational efficiency and profitability. It requires a methodical approach, starting with a baseline and making small, documented adjustments to find the sweet spot for your specific material and application.
Achieving a warp-free cut on ultra-thin stainless steel is a game of thermal management. The goal is to input just enough energy to vaporize the material in the kerf (the width of the cut) and evacuate it before that heat can conduct into the rest of the sheet. Every parameter—power, speed, frequency, and assist gas—is a lever you can pull to control this thermal input. For MFY clients working on projects demanding the highest precision, such as parts for consumer electronics or scientific instruments, we emphasize that there is no universal "best setting." The optimal parameters are a function of the material's specific grade and thickness, the complexity of the geometry being cut, and the specific model of their laser machine. Therefore, a disciplined process of testing and optimization is the only path to consistent, high-quality results.
Optimizing Laser Power and Pulse Frequency
The golden rule for cutting thin materials is to use the lowest possible power that will still achieve a clean, consistent cut. Excessive power is the number one enemy. It doesn't just cut the material; it boils it, creating a large melt pool that expands and transfers heat deep into the sheet, causing the dreaded warping. You want to vaporize the material, not melt it. Start with the laser manufacturer’s recommended settings for your material thickness and systematically reduce the power in small increments until the cut quality begins to degrade, then nudge it back up slightly.
For ultra-thin sheets, a pulsed laser is often superior to a continuous wave (CW) laser. A CW laser delivers a constant stream of energy, which can lead to significant heat buildup. A pulsed laser, however, delivers energy in short, high-peak-power bursts. This allows the material to cool for microseconds between pulses, drastically reducing the overall thermal load on the sheet. By adjusting the pulse frequency (the number of pulses per second) and the duty cycle (the duration of each pulse), you can exercise incredibly fine control over the heat input, effectively chiseling the material away rather than melting it.
We worked with a client producing fine-mesh filters from 0.3mm 316L stainless steel. With a CW laser, they couldn't avoid distortion. After switching to a pulsed fiber laser and optimizing the pulse frequency, they were able to produce perfectly flat, intricate parts. The short, sharp energy bursts were key to maintaining the integrity of the delicate mesh structure.
The Critical Role of Cutting Speed
Speed is your second-most-powerful tool against heat. The faster the laser head moves, the less time the laser energy has to dwell on any single point, and therefore, the less heat is absorbed by the surrounding material. For ultra-thin stainless steel, you should generally aim for the highest cutting speed possible that still allows for a full, clean separation of the part. This minimizes the Heat Affected Zone (HAZ)—the area of metal that is structurally altered by heat but not melted. A smaller HAZ means less thermal stress and less warping.
Finding the optimal speed is a balancing act. If you go too fast, the laser may not have enough time to penetrate the material completely, resulting in an incomplete cut or a ragged edge. If you go too slow, you are essentially "baking" the material, guaranteeing that it will warp. The ideal process involves creating a test matrix. On a scrap piece of the same material, cut a series of straight lines using the same power setting but varying the speed for each line. This will quickly reveal the "sweet spot" where the cut is clean and the dross (re-solidified metal on the bottom edge) is minimal.
This speed optimization is especially critical when cutting sharp corners or tight radii. Laser cutting software should be configured to automatically reduce the speed in these areas to prevent "burn-in" while maintaining a higher speed on straightaways. This intelligent control of speed is a hallmark of high-precision manufacturing.
Selecting the Right Assist Gas and Pressure
The assist gas does more than just protect the lens; it's an active participant in the cutting process. It serves two primary functions: it blows the molten material out of the kerf, and it can influence the thermal and chemical reactions at the cut face. For ultra-thin stainless steel, the choice is clear: high-pressure nitrogen.
Some fabricators use oxygen as an assist gas because it creates an exothermic reaction, which adds energy to the cut and allows for faster cutting speeds on thicker materials. However, for thin sheets, this extra heat is precisely what you want to avoid. It creates a larger HAZ and can leave an oxidized, blackened edge that may require secondary cleaning. Nitrogen, being an inert gas, does not react with the molten steel. It performs a purely mechanical function: it rapidly and efficiently ejects the molten material from the bottom of the cut before its heat can spread.
To be effective, the nitrogen must be supplied at a high pressure—often between 10 and 20 bar (145-290 PSI). This high pressure creates a powerful jet that cleanly expels the melt, resulting in a dross-free, shiny, metallic edge and, most importantly, minimal heat transfer to the part. While high-pressure nitrogen is more expensive than oxygen or compressed air, for applications where edge quality and dimensional stability are critical, the cost is easily justified by the elimination of warping and secondary finishing operations.
| Assist Gas | Cutting Mechanism | Edge Quality | HAZ Size | Best Application for SS |
|---|---|---|---|---|
| Nitrogen | Mechanical ejection (Melt & Blow) | Bright, metallic, dross-free | Minimal | Ultra-thin sheets (<3mm), high-quality finish |
| Oxygen | Exothermic reaction (Burning) | Black, oxidized, slight dross | Larger | Thicker plates (>3mm), when speed is prioritized over edge quality |
| Air | Mix of mechanical and slight oxidation | Dull, semi-oxidized, dross | Medium | General purpose, low-cost cutting where quality is not critical |
Nitrogen prevents oxidationTrue
Nitrogen is inert and doesn't react with molten steel, preventing oxidation and maintaining edge quality.
Oxygen reduces warpingFalse
Oxygen creates exothermic reactions that increase heat input, leading to more warping in thin sheets.
How does maintaining laser focus and speed contribute to a clean cut in ultra-thin sheets?
Imagine trying to read fine print with blurry vision; you lose clarity and detail. Similarly, an unfocused laser beam diffuses its energy, leading to wider, messier cuts and excess heat. Maintaining a precise focus and speed is about concentrating that power for maximum efficiency and minimal collateral damage.
Maintaining a sharp laser focus concentrates all the energy into the smallest possible point, ensuring rapid vaporization rather than melting. This allows for higher cutting speeds, which in turn minimizes the heat input into the sheet, preventing warping and producing a clean, narrow kerf.
The synergy between focus and speed cannot be overstated. A perfectly focused beam possesses the highest power density, which is what enables a clean cut at high velocity. If the focus is off, you have to compensate by either increasing power or decreasing speed—both of which introduce more heat and increase the risk of warping. Think of it like a finely tuned engine; every component must work in harmony. During my visits to various manufacturing facilities, I've seen firsthand how a poorly calibrated focal point can bottleneck an otherwise efficient production line. Operators would struggle with inconsistent cuts, blaming the material or the machine's power, when the root cause was simply a Z-axis that was off by a fraction of a millimeter. This highlights the need for regular machine calibration and an understanding of how focus dynamics change with different material thicknesses. It's a detail that separates average results from exceptional ones, ensuring every joule of laser energy is used for cutting, not for creating damaging waste heat.
In the realm of high-precision manufacturing, control is everything. The focal point of the laser is the "business end" of the entire system, where energy is converted into action. The position of this point relative to the material surface dictates the efficiency and quality of the cut. An improperly set focus is one of the most common yet easily correctable sources of cutting problems. It leads to a wider kerf, increased dross, and a larger HAZ—all contributing factors to warping. For ultra-thin stainless steel, where the margin for error is virtually zero, mastering focus control isn't just a tip; it's a prerequisite for success. It ensures the cut is as close to a purely ablative process as possible, preserving the integrity of the surrounding material.
The Concept of Focal Point and Power Density
The lens inside a laser cutting head focuses the laser beam to a tiny spot, typically a fraction of a millimeter in diameter. This point of maximum convergence is the focal point, and it is where the laser's energy, or power density (power per unit area), is at its absolute peak. Think of it as using a magnifying glass to focus sunlight; at the focal point, the energy is intense enough to burn, while just a short distance away, it is harmlessly diffuse.
For cutting, you want to leverage this peak power density to instantly vaporize the stainless steel. If the focal point is set too high (above the material surface) or too low (deep within the material), the beam that interacts with the top surface of the sheet will be wider and less powerful. This inefficient energy transfer fails to vaporize the metal cleanly. Instead, it creates a larger melt pool, which requires more assist gas pressure to clear and allows more time for heat to conduct into the sheet, leading directly to warping.
Therefore, the first step is always to perform a focus test to find the precise location of the Z-axis that corresponds to the perfect focus. Modern laser systems often have auto-focus capabilities, but these should be regularly calibrated to ensure their accuracy, as sensors can become dirty or misaligned over time.
Setting the Correct Focal Position for Thin Sheets
The ideal focal position is not always exactly on the top surface of the material. For cutting ultra-thin stainless steel (generally less than 1mm), the best results are often achieved by setting the focal point slightly below the top surface, typically at about one-third to one-half of the material's thickness. This technique is known as negative focal positioning5.
Setting the focus inside the material ensures that the beam's high power density is maintained through the entire thickness of the cut. This promotes a faster, cleaner ejection of molten material from the bottom of the kerf and results in straighter, more parallel cut edges. It also helps in achieving a narrower kerf width, which is often desirable for intricate designs and parts with tight tolerances. If the focus is set on the top surface, the beam begins to diverge as it penetrates the material, leading to a tapered cut and a less efficient process.
Conversely, a positive focal position (above the surface) can sometimes be used to achieve a very smooth top edge, but it often comes at the cost of increased dross on the bottom edge and a wider cut. For the vast majority of thin stainless steel applications where warping is the primary concern, a slight negative focus is the recommended starting point. Experimenting with small adjustments to this position can fine-tune the edge quality to perfection.
The Interplay Between Focus, Speed, and Kerf Width
A sharp, well-placed focus enables the use of higher cutting speeds. Because the power density is maximized, the material is vaporized almost instantaneously, allowing the laser head to move more quickly across the sheet. As we've established, higher speed means lower thermal input and less warping. This relationship forms a virtuous cycle: a better focus allows for a faster speed, which produces a better cut.
This synergy also influences the kerf width. A precisely focused beam creates the narrowest possible kerf. A narrow kerf is not only a sign of an efficient cut but also a critical factor in producing high-precision parts. It means less material is removed, and the geometric accuracy of the final part is higher. Furthermore, a narrower kerf means less molten material needs to be ejected, reducing the energy required and further minimizing the HAZ.
Consider a client of ours who manufactures micro-mechanical components. Their parts often feature delicate struts and holes that are very close together. A wide, sloppy kerf from an unfocused laser would simply destroy these features. By maintaining a perfect focus, they achieve a kerf of less than 0.1mm, allowing them to produce complex geometries that would otherwise be impossible while ensuring the parts remain perfectly flat. This demonstrates that focus is not just a setting; it's the enabler of both speed and precision.
Sharp focus enables faster cuttingTrue
A precisely focused laser beam achieves higher power density, allowing for rapid vaporization and faster cutting speeds while minimizing heat input.
Focus should always be on material surfaceFalse
For ultra-thin sheets, optimal cutting often requires setting the focal point slightly below the surface (negative focal positioning) to maintain power density through the material thickness.
What cooling techniques help prevent warping during the laser cutting process?
Even with optimized settings, laser cutting generates heat. For ultra-thin sheets, this residual heat can be enough to cause deformation. You need an active strategy to remove this heat before it can do damage, protecting the integrity of your final part and preventing costly waste.
Effective cooling techniques to prevent warping include using a support bed like a honeycomb table that promotes airflow, applying targeted air or water jets near the cut, and using heat-sink materials like copper plates adjacent to the cutting path to actively draw heat away.
Transition paragraph: Implementing a cooling strategy is like having a firefighter on standby during the cutting process. While your optimized laser settings are designed to prevent the fire (excessive heat), the cooling system is there to extinguish any embers (residual heat) that still manage to appear. One of our partners, a manufacturer of decorative architectural panels in the Middle East, faced challenges with distortion on large, intricately cut 1mm stainless steel sheets. The long cutting times meant that even a small amount of heat buildup would accumulate and cause the entire panel to buckle. We advised them on installing a series of small, adjustable air jets that traced the path of the laser head. This simple, localized cooling was enough to dissipate the residual heat, keeping the large panels perfectly flat from start to finish. This shows that cooling doesn't have to be a complex, integrated system; often, a well-thought-out, targeted approach provides the necessary thermal control to ensure a high-quality, warp-free result.
Thermal management is the central theme in preventing warping, and active cooling is its most direct form. While preparation and parameter optimization focus on minimizing heat input, cooling focuses on actively removing the heat that is inevitably generated. This is especially critical for ultra-thin materials, which have very little mass to absorb and dissipate thermal energy on their own. The goal of any cooling technique is to create a steep thermal gradient, pulling heat away from the cut zone as quickly as it is introduced. This prevents the heat from "soaking" into the surrounding material, which is the direct cause of the expansion and contraction that leads to warping. A proactive cooling strategy is a sign of a mature and sophisticated manufacturing process.
Passive Cooling: Support Beds and Heat Sinks
Passive cooling techniques are those that don't require an external energy source, instead relying on material properties and clever design. The most fundamental form of passive cooling is the cutting bed itself. As mentioned earlier, honeycomb and pin-style tables are superior to solid or slat beds because their open structure allows heat and hot gases to escape downwards, away from the material. This natural convection is a simple but effective first line of defense against heat buildup.
A more active form of passive cooling involves using heat sinks. Materials with high thermal conductivity, like copper or aluminum, can be placed in direct contact with or in close proximity to the stainless steel sheet. These materials act like a sponge for thermal energy, drawing heat out of the workpiece and into themselves. For repetitive jobs, fabricators can create custom fixtures with integrated copper heat sinks that frame the cutting path.
For example, a client producing small, rectangular tags from a thin stainless steel sheet could use a larger copper plate with a cutout matching the tag's dimensions. The stainless steel sheet is placed on top, and the laser cuts the tag out. The vast majority of the waste heat is immediately absorbed into the massive copper sink, leaving the small tag and the surrounding sheet cool and perfectly flat.
Active Cooling: Air and Water Jets
Active cooling involves applying a fluid—most commonly air or water—to rapidly cool the material. A strategically aimed jet of compressed air, separate from the assist gas, can be highly effective. Positioned to trail the laser head by a few centimeters, this jet of ambient-temperature air cools the just-cut edge, quenching it before the heat can spread. This method is popular because it's relatively easy to implement, low-cost, and doesn't introduce significant moisture to the workspace.
For more intense cooling, a fine mist or jet of water can be used. Water has a much higher specific heat capacity than air, meaning it can absorb significantly more thermal energy. This makes water jet cooling extremely effective. However, it also introduces complexity. The water must be carefully controlled to avoid interfering with the laser beam itself, and the workpiece and machine must be protected from potential corrosion and water damage. Distilled or deionized water is often used to prevent leaving mineral deposits.
While highly effective, water cooling is typically reserved for situations where warping is a severe and persistent problem that cannot be solved by other means. For most ultra-thin stainless steel applications, a combination of a good support bed and targeted air jets provides a sufficient and more practical cooling solution.
Integrated Cooling Systems and Environmental Control
The most advanced laser cutting systems may feature cooling integrated directly into the machine's design. This can include a chilled cutting bed, where a coolant is circulated through channels beneath the work surface, maintaining the entire support structure at a consistently low temperature. This provides a constant, uniform heat sink across the entire sheet, offering exceptional stability for the most demanding applications.
Another aspect of environmental control is the ambient temperature of the workshop itself. While not an "active cooling" technique in the traditional sense, operating in a climate-controlled environment ensures that the starting temperature of the material is stable and predictable. It prevents external variables, like a hot afternoon, from adding to the thermal load on the material.
Ultimately, the choice of cooling technique depends on the specific application, material thickness, and the complexity of the part. For many jobs, passive methods are sufficient. For more challenging cuts, adding targeted air jets is a logical next step. By thinking of cooling as an essential part of the process, fabricators can add another layer of control, ensuring that the final product meets the highest standards of quality and flatness, which is a core promise of the materials we supply at MFY.
| Cooling Technique | Effectiveness | Cost & Complexity | Best For |
|---|---|---|---|
| Passive (Support Bed) | Low | Low | All thin sheet cutting as a baseline. |
| Passive (Heat Sinks) | Medium | Low-Medium | Repetitive jobs with fixed geometries. |
| Active (Air Jets) | High | Medium | Intricate patterns or large parts with long cut times. |
| Active (Water Mist/Jet) | Very High | High | Extreme cases of warping; where other methods fail. |
| Integrated (Chilled Bed) | Very High | Very High | High-end machines for ultimate precision and process stability. |
Honeycomb beds aid coolingTrue
Honeycomb tables promote airflow and natural convection, helping dissipate heat from the cutting area.
Water cooling is always bestFalse
While highly effective, water cooling introduces complexity and is typically reserved for severe warping cases when other methods fail.
What post-cutting inspections and adjustments ensure the best results for thin stainless steel sheets?
The laser's work is done, but the job isn't finished. A final inspection and, if necessary, minor adjustments are what separate a good part from a perfect one. This final quality control step ensures that the parts you deliver meet all specifications and upholds your reputation for excellence.
Post-cutting, a thorough inspection for dimensional accuracy, edge quality (checking for dross or burrs), and overall flatness is essential. Any minor imperfections can then be addressed through careful deburring or light finishing to ensure the part meets all specifications before delivery.
This final quality check is your last chance to catch any deviations before they become a problem for your customer. It’s a crucial feedback loop. By systematically analyzing the finished part, you can gain insights that help you further refine your laser parameters for the next run. I once visited a client who was producing parts for a high-end appliance. Their cuts were good, but they had a small, consistent burr on the underside of the parts. While insignificant to the naked eye, it was affecting the downstream automated assembly process. We analyzed the part together and traced the issue back to a slightly low assist gas pressure. A minor adjustment on the machine eliminated the burr on all subsequent parts. This saved them the time and cost of manual deburring and prevented a potential assembly line stoppage for their customer. This illustrates that post-cutting inspection is not just about pass or fail; it's an active tool for continuous process improvement and maintaining strong client relationships.
The post-cutting stage is where you validate the success of all your preparation and process control efforts. It's the moment of truth where the part is measured against the print and assessed for any subtle flaws that might have been introduced during cutting. For a company like MFY, which stands for quality, we always emphasize to our clients that this final step is integral to the value they provide. A part that is dimensionally accurate, flat, and has a clean edge profile is the physical manifestation of manufacturing competence. This stage involves a combination of metrology, visual inspection, and, if needed, careful finishing work to deliver a component that is ready for its final application without any compromises. It closes the loop on the quality control process.
Dimensional Accuracy and Flatness Verification
The first and most objective check is for dimensional accuracy. Using precision measuring tools like digital calipers, micrometers, or even more advanced vision systems or CMMs (Coordinate Measuring Machines), the part's critical dimensions should be compared against the original CAD drawing. This verifies that the laser kerf was correctly compensated for and that the part is within the specified tolerances.
At the same time, the part's flatness must be verified. This can be done by placing the component on a certified flat surface, such as a granite inspection table, and using a feeler gauge to check for any gaps underneath. This test will immediately reveal any warping or distortion that may have occurred, no matter how slight. For a part that is supposed to be flat, this is a simple pass/fail test.
If dimensional inaccuracies or warping are found, it's a clear signal that the process needs adjustment. This isn't a failure, but rather valuable data. Was the cutting speed too high, causing the corners to be rounded? Was the heat input too great, causing the distortion? This systematic analysis allows the operator to go back and refine the laser settings—power, speed, focus, or gas pressure—for the next batch, creating a cycle of continuous improvement.
Inspection of Edge Quality and Dross Removal
Next is a close visual and tactile inspection of the cut edges. The ideal edge on a nitrogen-cut stainless steel sheet should be smooth, shiny, and metallic. Look for any signs of striations (vertical lines), roughness, or discoloration. These can indicate issues like an unstable laser power, incorrect focus, or fluctuating assist gas pressure.
The most common edge defect is dross, which is molten material that re-solidifies on the bottom edge of the cut. While optimized parameters should minimize dross, small amounts can sometimes occur, especially when piercing the material or navigating sharp corners. This dross is often loosely attached and can be removed with a light touch. A gentle scrape with a deburring tool, a light pass with a fine-grit abrasive pad, or tumbling in a vibratory finisher for larger batches can effectively remove it without damaging the part itself.
It is critical that this deburring process be done with care. Aggressive grinding or filing can damage the part's edge, alter its dimensions, and even introduce new stresses. The goal is a subtle finishing touch, not a major rework operation. If significant, hard-to-remove dross is present, the correct response is to fix the laser parameters, not to spend excessive time on manual finishing.
Cleaning and Handling
Once the part has passed dimensional and edge quality inspection, a final cleaning is often required. The cutting process, even with an inert assist gas, can leave a very fine layer of dust or condensate on the surface. Handling the parts can also leave fingerprints, which can be problematic for materials that need to be welded or painted later. A final wipe-down with a clean cloth and a suitable solvent ensures the part is pristine.
Proper handling and packaging are the last steps. Thin, delicate parts should be handled carefully to avoid bending or scratching. For shipping, they should be packaged securely, often with interleaving paper or plastic film between parts to prevent surface-on-surface abrasion. This ensures that the perfect part you produced in your workshop arrives at your customer's facility in the same perfect condition.
This entire post-cutting regimen, from measurement to packaging, is the final expression of a commitment to quality. It ensures that the advanced properties of the ultra-thin stainless steel you've selected are delivered in a final component that is flawless in form and function, reinforcing your status as a high-quality manufacturer.
Conclusion
Ultimately, achieving warp-free laser cutting for ultra-thin stainless steel is a holistic process. It relies on meticulous preparation, precise control of laser power and speed, effective cooling, and diligent final inspection. Mastering these techniques transforms a major challenge into a competitive manufacturing advantage.
-
Understand the pros and cons of ultra-thin stainless steel in manufacturing applications ↩
-
Discover MFY’s comprehensive strategy from production to delivery in the stainless steel industry ↩
-
Understand applications and benefits of 304 and 316 stainless steel sheets. ↩
-
Learn about issues like warping and how to overcome them when cutting thin stainless sheets ↩
-
Learn about the benefits and techniques of negative focus in precise laser cutting ↩
Have Questions or Need More Information?
Get in touch with us for personalized assistance and expert advice.